
I created a Time-lapse in Photoshop but then realized, I wanted to see how it looks on different frame rate. In Premiere Pro CC, it is easy to change the frame rate by right clicking on the bin, click interpret footage and change the frame rate. But that doesn’t work in Photoshop.
So, how to modify the frame rate for your time-lapse in Photoshop?
Here are 5 simple easy steps to Create and Modify the time-lapse frame rate in Photoshop
Step 1: Import the image by clicking Open, On the window chose the first image in the sequence, and chose Image sequence. This step I’m not going in to detail, because If you’re looking to modify the time lapse frame rate in Photoshop, I assume, you have already created the time-lapse sequence and your timeline is visible with the image sequence.
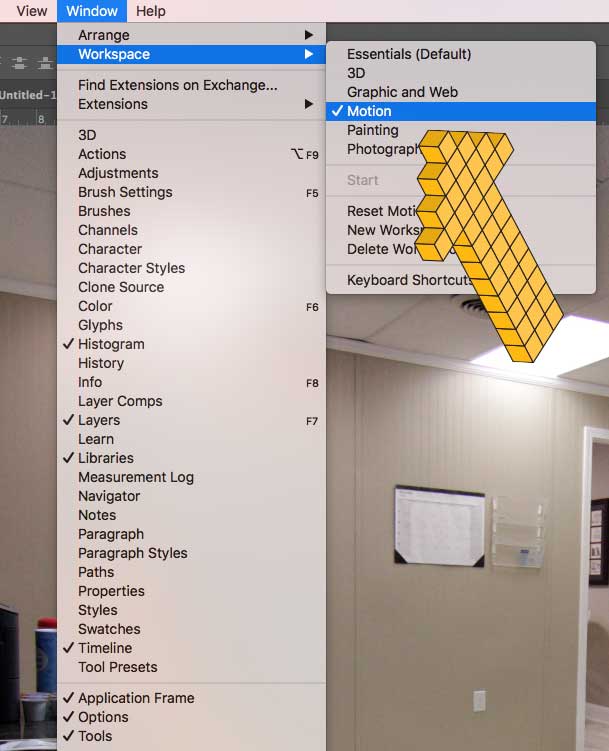
Step 2: If you are not seeing the Timeline, go to Menu>Window>Workspace> Choose Motion
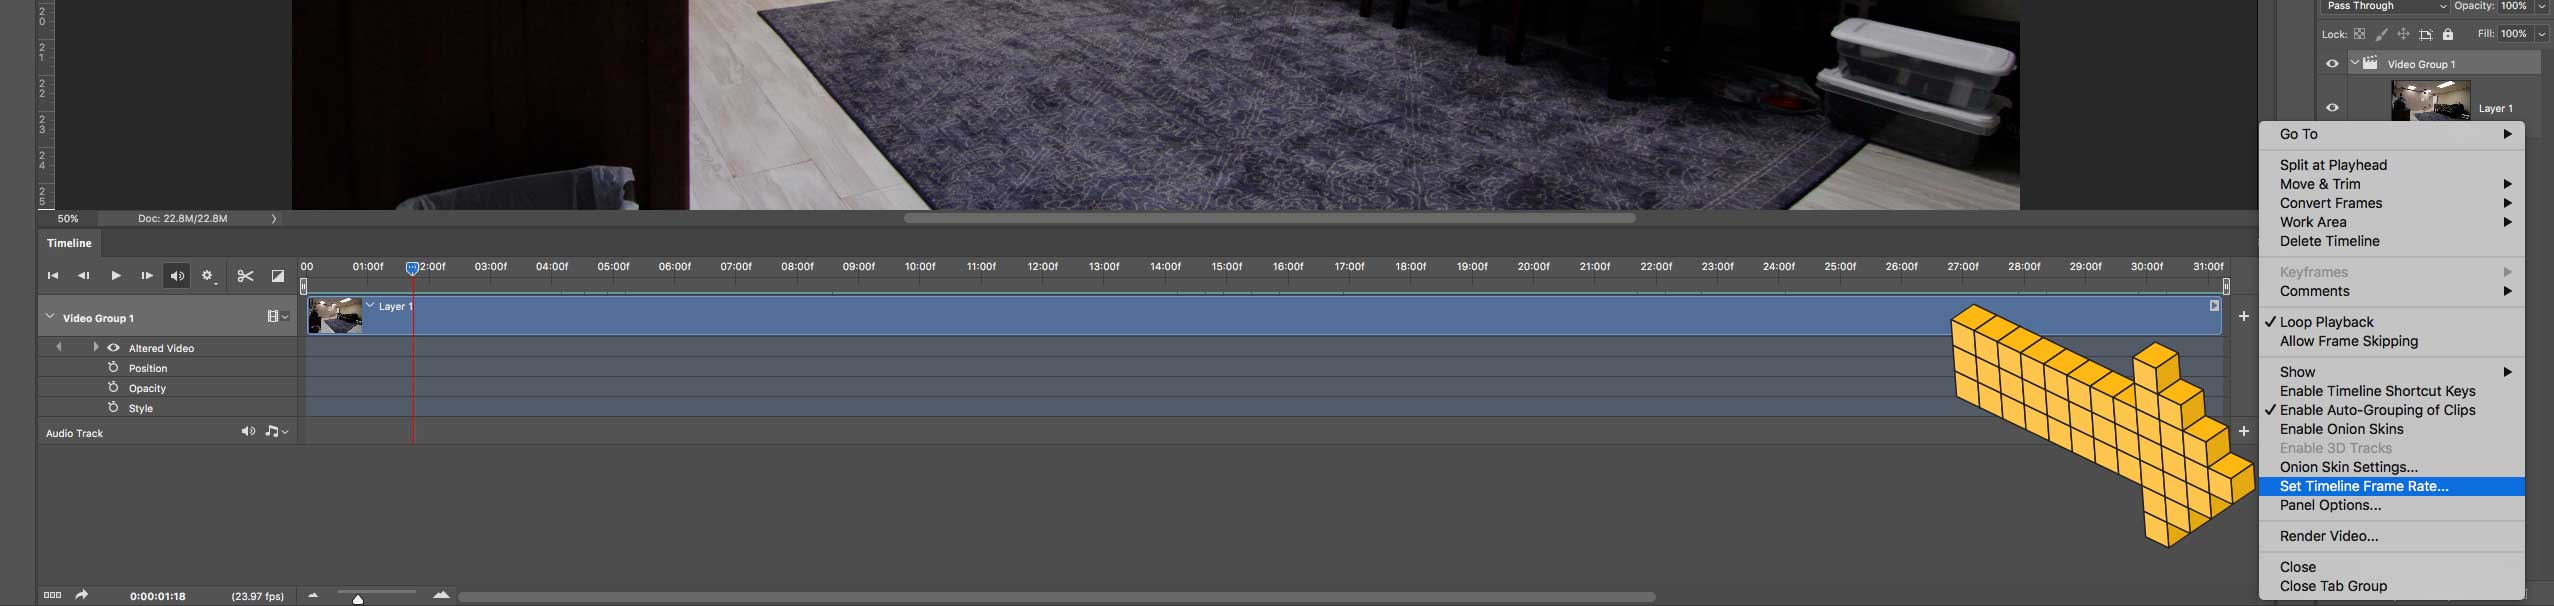
Step 3: Click on that fly out menu in the timeline right top corner also known as a hamburger menu as you see in the below image
Step 4: Chose Set Timeline Frame-rate
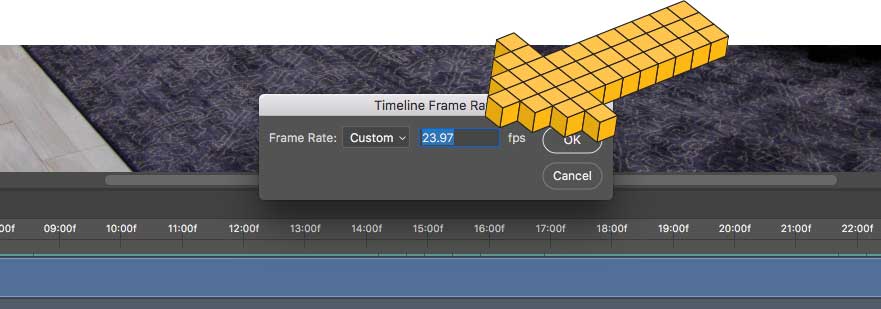
Step 5: On the pop-up window, enter your new frame rate. You can be creative here to try out any frame rate input and see how it looks before finalizing
That’s it.